
 A sign that I've lived in Michigan for too long (apparently a year is too long) is that I frequently refer to soda as pop.
Well, a while back when I was making these with my boys, I ended up having this band of the bottle left over. I was goofing around and I had an idea. Why not make it into a cute bangle? And that is just what I did. I did it two different ways, once with a 2 liter bottle and once with a 20 oz. bottle. I will show you both ways.
 What you need:
Pop bottle, any size really
Self Healing Mat
Ruler/Measuring tape
Exacto/ Scissors
Goo Gone
Fabric
Embellishments
Spray Adhesive
Ribbon
Hot glue gun
Poky Tool(can't remember this tools name, sorry)
Jewelry findings/clasps
Fray Check
I started out by removing the label and adhesive with some goo gone and a paper towel.
 Part I:With the 2 Liter Bottle
Slice the bottle down the side.
Cut a straight edge down one of the long sides. Trim it to the width you want. I did several, anywhere from 1.5-2" wide.
 When you slice down the side of the 2 liter bottle, it will coil up like this. Since the 2 liter bottle was way to big for a bracelet, I marked what would make one "complete" ring. You can do a bigger piece for a bigger wrist I suppose.
 Cut at the marking.
 If you want the bangle to be a little heavier, which I did for this one, I cut two identical pieces.
 Then I applied some hot glue at one end of one piece. Make sure you use a low temp glue gun or your plastic will warp a bit, I learned my lesson.
 Then line up the 2nd piece over top and squish them together.
 Continue gluing them together a little bit at a time until they are completely adhered. (You can choose to use only one layer rather than the two and they still look great, I just liked the little bit of added weight and stability).
 Next cut a piece of fabric. You want it to over hang the short edges slightly, about 1/2"-1". I just took a scrap of fabric and held it up to the pop bottle and eyeballed it.
 You want it to be wide enough to overlap in the middle on the long side. My bracelet was 2" wide, so I cut my fabric about 4 1/4" wide.
 Now take your spray adhesive, I love Elmer's multipurpose spray adhesive, and evenly coat your fabric. Make sure to place your fabric on top of a large piece of paper to catch the stray adhesive that is sprayed.
 Quickly place the pop bottle centered in the middle of your fabric. Now smooth the fabric around the pop bottle. First fold the ends down. Then fold the long sides in. You may want to give an extra little spray to the fabric up along the short end that has been folded over.
  Here is a better picture of how I folded the ends.
 I thought this was cute, but couldn't leave good enough alone. I wanted to make sure it would last.
 Take a piece of coordinating ribbon and measure it to fit the entire way around the inside of the bangle. Begin at one end and glue the ribbon over the center seam down the inside of the bangle.
 Cut two more pieces of ribbon to slightly overhand the short end of the bangle. Lay a bead of hot glue on the end of the bangle.
 Place the ribbon over the glue with the edges overhanging.
 Glue the overhanging edges in.
 Glue the ribbon down to the inside.
 Repeat on the other end.
 You can leave it as is or you can add jewelry findings to make it harder for kids to pull off. I'm just saying. So if you want to add the findings, follow the following steps.
Get out your "poky" tool. (I can't remember what this tool is called, sorry.) I'm sure you could use a large needle or tiny nail also. Poke a hole in the center of each end of the bangle, making sure you are going through the plastic.
 Slip a jump ring through the whole and close it. I turned the ring so that the closure was inside the ribbon and fabric part of the bangle.
 Add a clasp and your set.
 Embellish as desired. I loved this one where I used the rolled fabric flowers.
Part II: Using a 20 oz. bottle
Begin by cutting one end of the bottle off. Measure from that end to the desired width of your bracelet.
 I put a little dot at my length every little bit the entire way around the bottle.
 Then I laid my measuring tape up against my markings and connected them to make an easy cutting line.
 Using an Exacto knife cut along your line.
 Trim up any uneven edges with your Exacto or a pair of scissors.
 Follow the steps above for adhering the fabric to the pop bottle. The only difference is that you want the fabric to overlap in each place where it meets. Can you see the seam?
 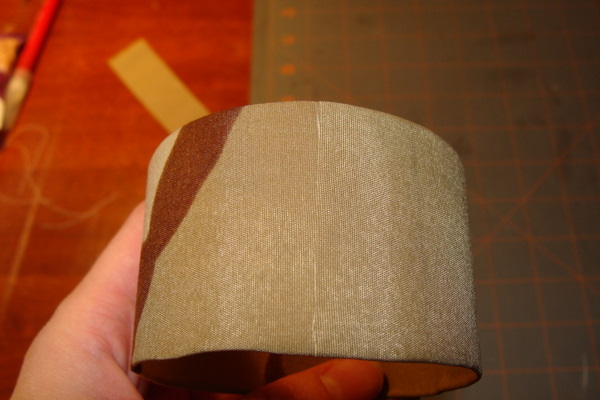 Again you will want to cover your inside seam with some ribbon. Where the two edges of ribbon meet, fold over and glue the end of the ribbon to itself before gluing down.
You can also apply ribbon along the other seam if desired. I applied fray check to the seam instead.

 Because my son wanted to help, we used some camo fabric. As it was for him I decided to simplify the embellishment. You can do it this way too!
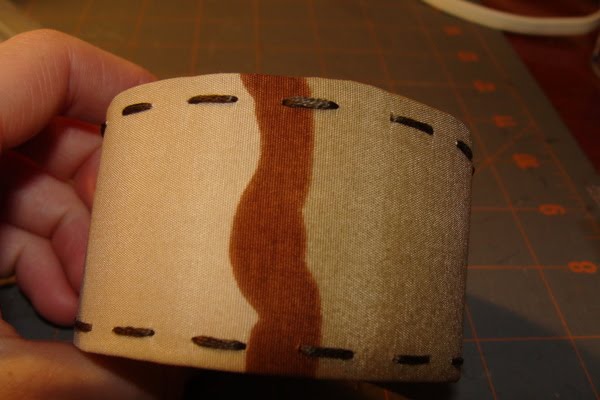 Take your "poky" tool at even intervals poke holes along each edge of the bangle. You really could do any pattern with this. I have a lot of fun ideas in mind.
 Now thread a needle with some embroidery floss and begin by coming up from the inside so that you can hide your knot and start stitching.
  Hand it over and perfectly please your 2 1/2 year old.
 Although it fits his ankle better. Now, 2-3 months later, he still wears this, so I call it a success.


